HA-TOY02
Hearit.AI BirthdayBird
Device Information
- Product Model: HA-TOY02
- Device Guide: TOY02 User Guide
Firmware Update Methods
We regularly release new firmware to optimize performance and add new features. You can update your device using one of the following methods:
Method 1: Online Firmware Update
Before updating firmware, you need to connect your HA-TOY02 to a WiFi network.
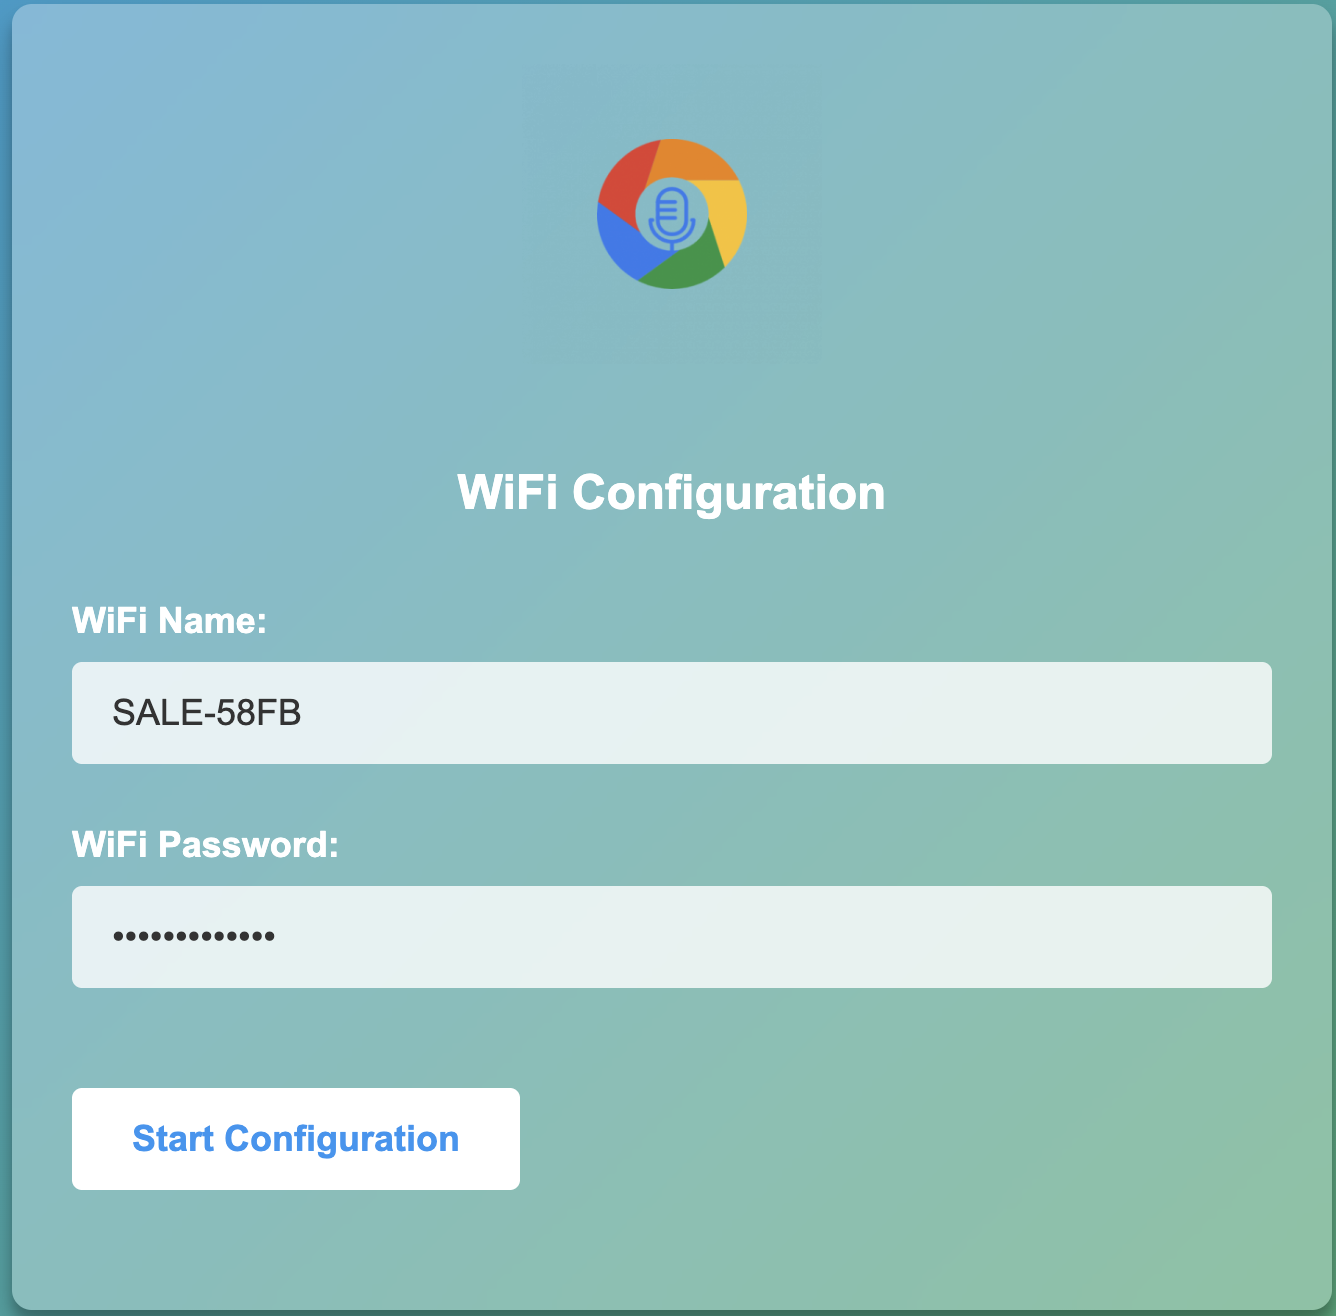
WiFi Configuration
Step 1: Connect to WiFi Configuration Portal
- Visit https://hearit.ai/wifi/ in your web browser
- Enter your WiFi network name (SSID) and password
- Important: Make sure your WiFi network operates on the 2.4GHz frequency band
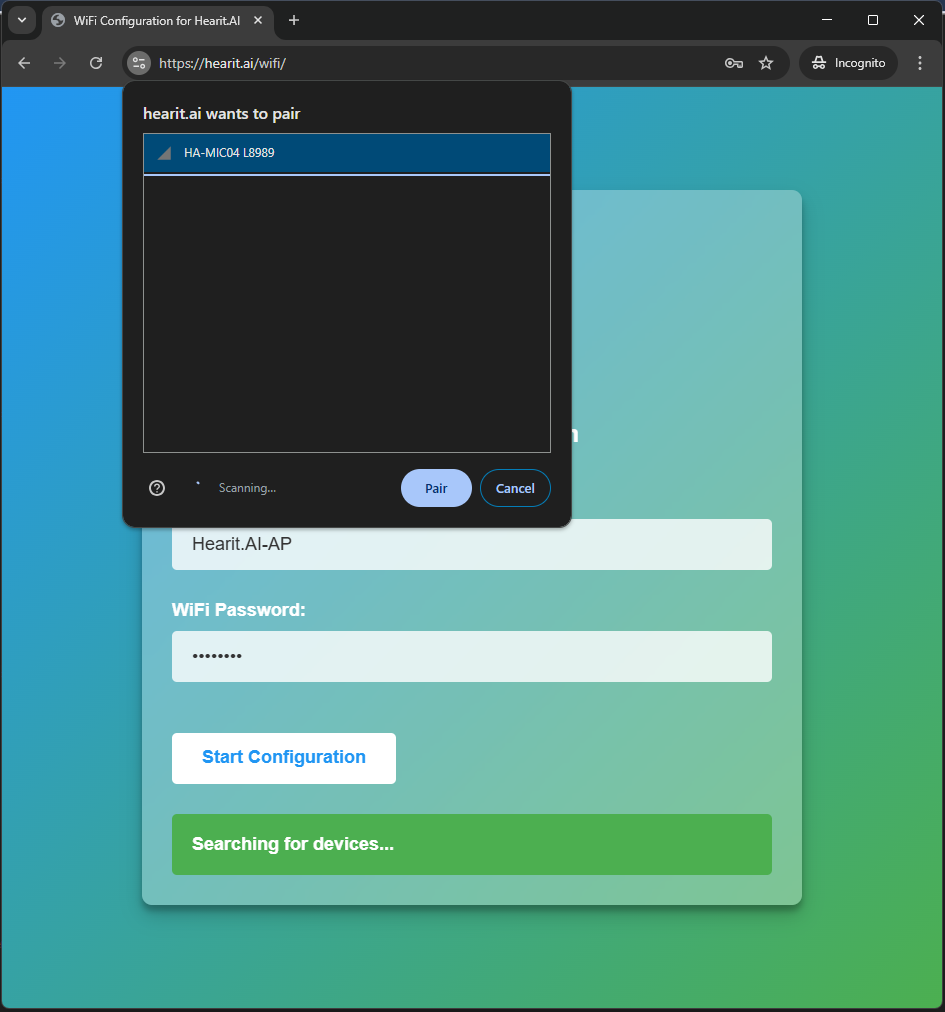
Step 2: Connect Your Device
- Click "Start Configuration"
- When prompted, search for and connect to your HA-TOY02 device
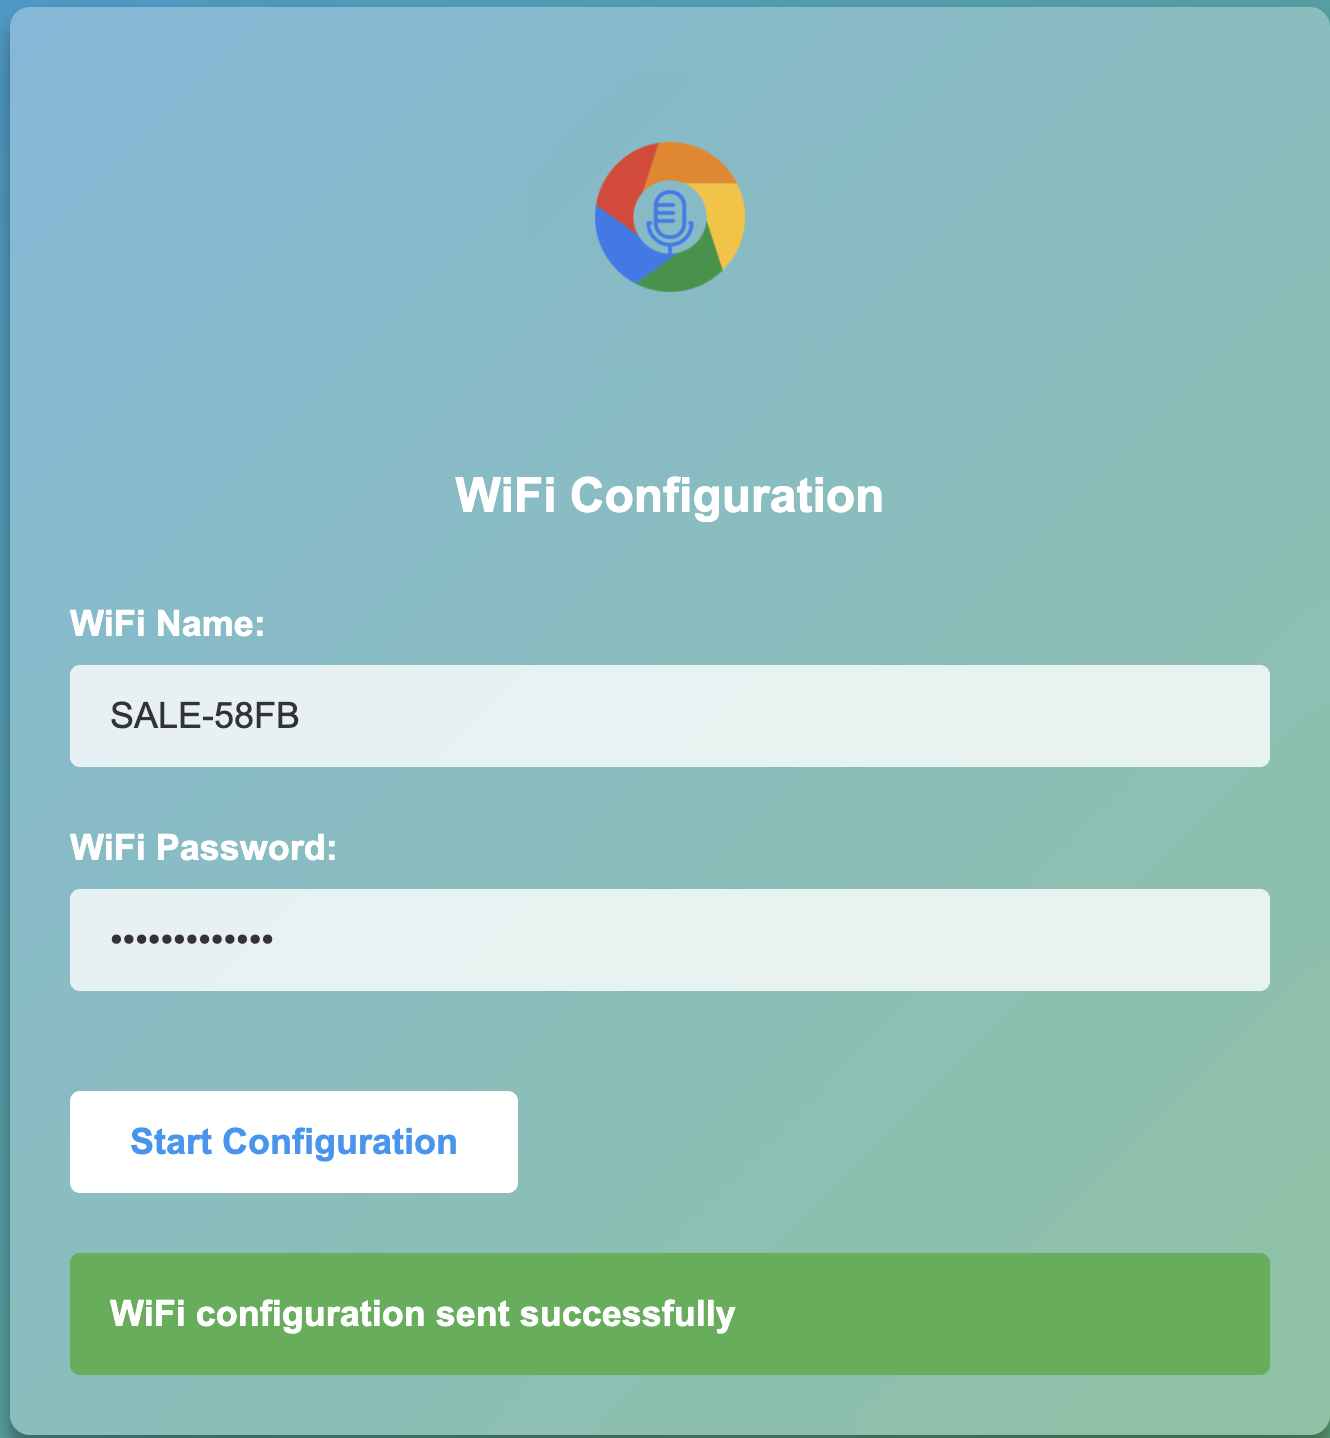
Step 3: Transfer WiFi Credentials
The website will automatically transmit your WiFi credentials to your HA-TOY02 device
Update Procedure
Step 1: Configure WiFi Connection
Before updating firmware, make sure your device is properly connected to WiFi by following the WiFi Configuration instructions in the device guide.
Step 2: Initiate Firmware Update
- Ensure your device is powered on and connected to WiFi (🟢 green LED steady on)
- Quickly press the Power Button 4 times in succession (Quadruple Press)
- The device will automatically check for available updates
Step 3: Monitor Update Progress
The LED indicator provides real-time feedback on the update process:
| LED Status | Meaning | Action Required |
|---|---|---|
| 🟡 Steady Yellow | Checking for updates | Wait while the device connects to the update server |
| 🟡 Flashing Yellow | Update in progress | Do not turn off or reset the device during this process |
| 🔴 Flashing Red | WiFi issue or update failed | Check your WiFi connection and try again |
| ⚪ Flashing White | No updates available | Your device already has the latest firmware |
Step 4: Update Completion
When the update process completes successfully:
- The device will automatically restart
- The LED will return to its normal state
- Your device will be ready to use with the latest firmware improvements
Troubleshooting
If your firmware update fails (indicated by 🔴 flashing red LED):
- Check that your WiFi network is operating on the 2.4GHz band (5GHz is not supported)
- Ensure your WiFi signal is strong where the device is located
- Verify your WiFi network has internet access
- Try moving closer to your WiFi router
- Restart your device and try the update process again
Method 2: Product Flashing (Windows)
This method is suitable for advanced users or when the online update is not available.
Preparations Before Starting
Required Items:
- A computer running the Windows operating system (supports Windows 7/8/10/11)
- Original USB data cable
- Device to be flashed
- Flashing program corresponding to the device (
.exefile)
Notes:
- Ensure the computer has sufficient battery power to avoid power failure during operation
- Use the original USB data cable to ensure connection stability
- Disable antivirus software and firewalls on the computer before flashing to prevent interference with program operation
- Do not disconnect the USB connection or close the flashing program during the flashing process
Flashing Steps
Step 1: Prepare the Device
- Ensure your device is charged (at least 50% battery)
- Power on the device if it's not already on
- Connect the device to your computer via USB cable
- The device should be recognized as a USB device
Step 1: Enter Update Mode
- Press the Front button 5 times quickly, then hold for 3 seconds (or Side button)
- Connect the HA-TOY02 to your computer via USB Type-C cable
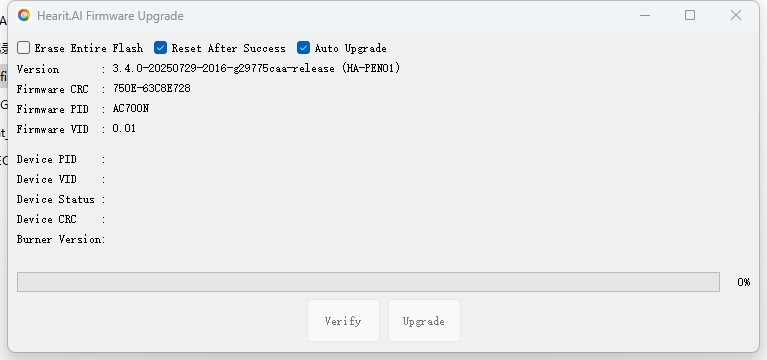
Step 2: Launch the Flashing Program
- Locate the flashing
.exefile corresponding to the device - Double-click the file to launch the flashing program
- Wait for the program to load completely (the main program interface usually appears)
Step 3: Device Detection
- Ensure the USB connection is secure between your computer and the device
- The flashing program should automatically detect the device
- Confirm the connection status displayed on the program interface
Step 4: Automatic Flashing Process
- The flashing program will automatically begin the firmware update
- The program interface will display the connection status and flashing progress
- Wait for the flashing to complete; do not perform any operations during this period
Step 5: Manually Trigger Flashing (If Automatic Flashing Does Not Start)
- If the program does not start flashing automatically, check the USB connection
- Find and click the "Update Mode" or "Start Flashing" button in the flashing program interface
- Observe the progress bar displayed on the program interface and wait for the flashing to complete
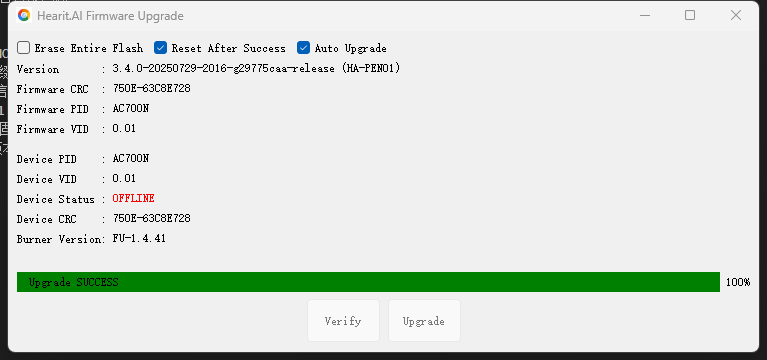
Completion and Verification
- After successful flashing, the program will display a prompt message such as "Flashing Completed" or "Success"
- The device will restart automatically or prompt that it can be disconnected
- Disconnect the USB connection and check if the device can start normally
- If the device starts normally, the flashing is successful
Technical Support
For assistance with firmware updates:
- 📧 Email: support@hearit.ai
- 🌐 Website: https://www.hearit.ai